Configuring Thunderbird 2
Thunderbird is an open source email client which is comparable to Microsoft Outlook Express. Thunderbird is a full featured cross platform email client that runs on Windows, OS X, Linux, and other platforms. While Thunderbird may run on different platforms, the setup is essentially the same for each.
This document will help you configure your Thunderbird email client.
Step 1: The Account Wizard
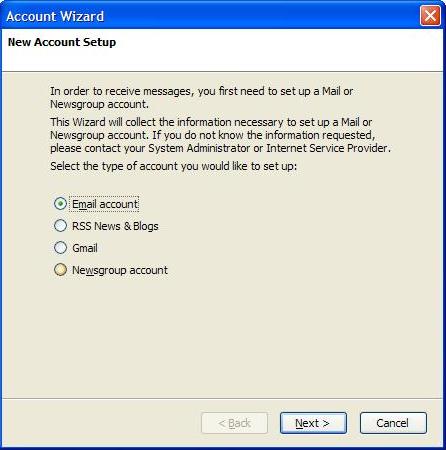
The first time you run Thunderbird, the Account Wizard automatically pops up. If it does not automatically pop up, click on the Tools menu, then select Account Settings, then Add Account.
Make sure "Email Account" is selected and hit next.
Step 2: Identity
On this screen, enter your name as you want it to appear on email sent from you in the "Your Name" field.
For the "Email Address" field, enter your full email address (yourusername@iglou.com) . After this information is filled out, hit "Next".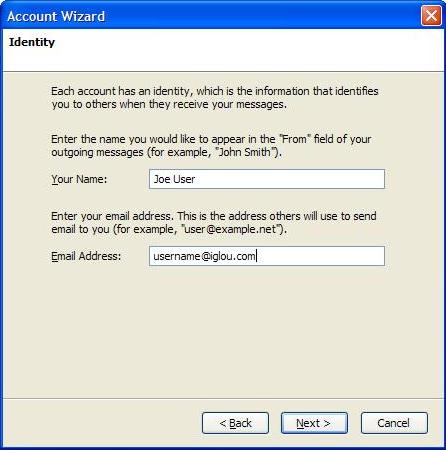
Step 3: Mail Server Information
The type of incoming server we will be using is POP, which is selected by default.
For "Incoming Server", type in mail.iglou.com
For "Outgoing Server", also type in mail.iglou.com
Then hit "Next".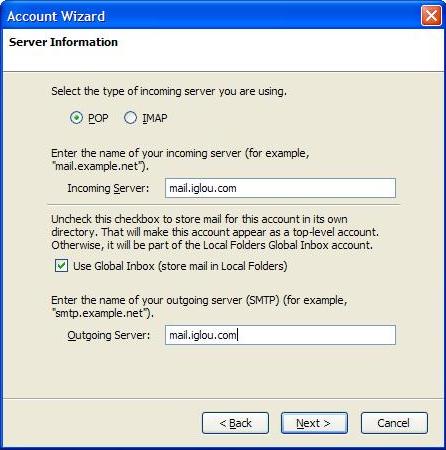
Step 4: Username
Here, you want to enter your username. Your username is your email address withoutthe @iglou.com. This is used to authenticate you for sending and recieving email. After you have your user name typed in, hit "Next".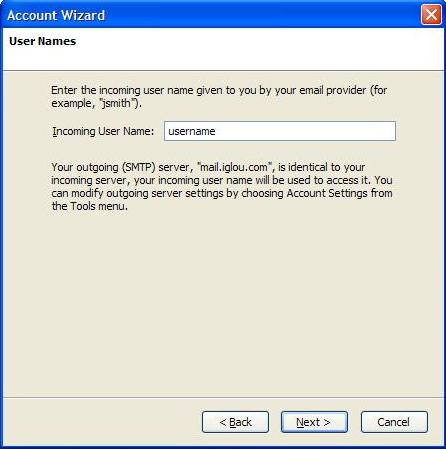
Step 5: The Account Name
By default, your Account Name will be your email address, but can be changed to whatever you want. This field is just a description used to help you identify which account you are using. Then hit "Next".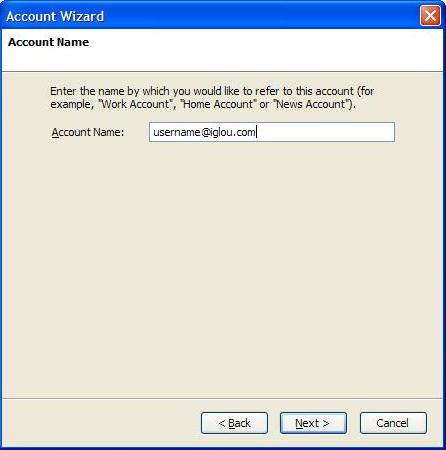
Step 6: Completing the Wizard
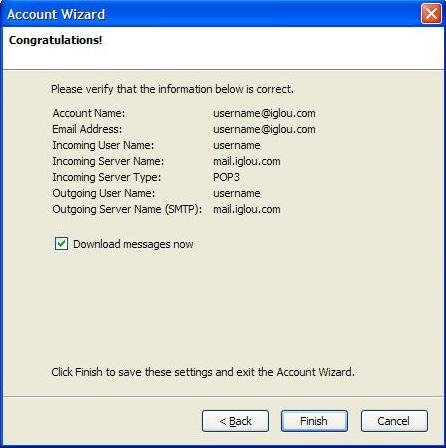
This next screen is just to verify the information that Thunderbird will use. Hit 'Finish' to download your messages from your IgLou account.
Step 7: Configuring SMTP (Outgoing Mail)
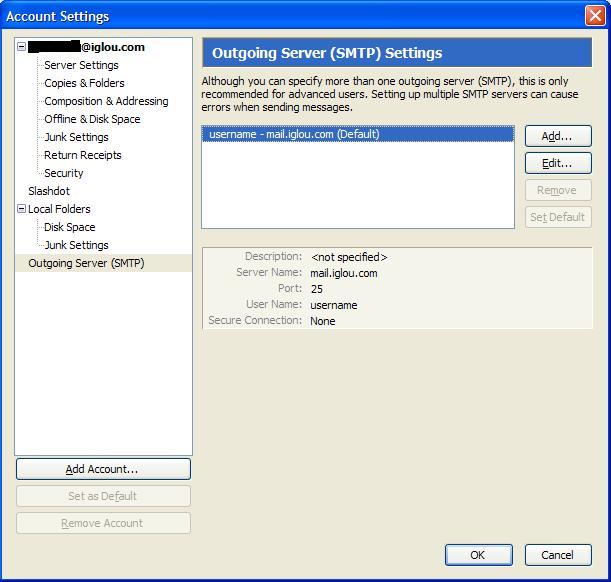
Click on Tools, then Account Settings, and select Outgoing Server (SMTP). Next click on Edit.
Once you click on Edit, you will get the following screen:
Change 'Port' from 25 to 587.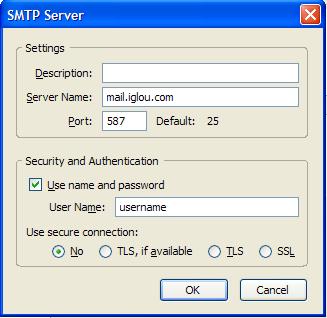
Go ahead and click Ok, and it will bring you back to the Account Settings screen. Click OK to take you back to your inbox.
